Introduction:
Morgan State Company latest high-tech product is a credit card with an embedded microcontroller and 3 LEDs that are used to indicate an approved or denied transaction. If the transaction is approved only 1 LED flashes however; 3 LEDs simultaneously flashes if it is denied. My mentor is out of town demonstrating this new high-tech credit card to potential customers when she realizes the LED functions were accidently omitted from the design code. She doesn’t have the resources to make the modifications to the code so she calls me to make the modifications for her. The Arduino board is an excellent substitute for the original design platform so I decide to use it to test my code before sending it to her. The company’s software policy states all changes must be documented. While someone else will integrate my code into the original design I am responsible for creating the documentation that explains my design code.

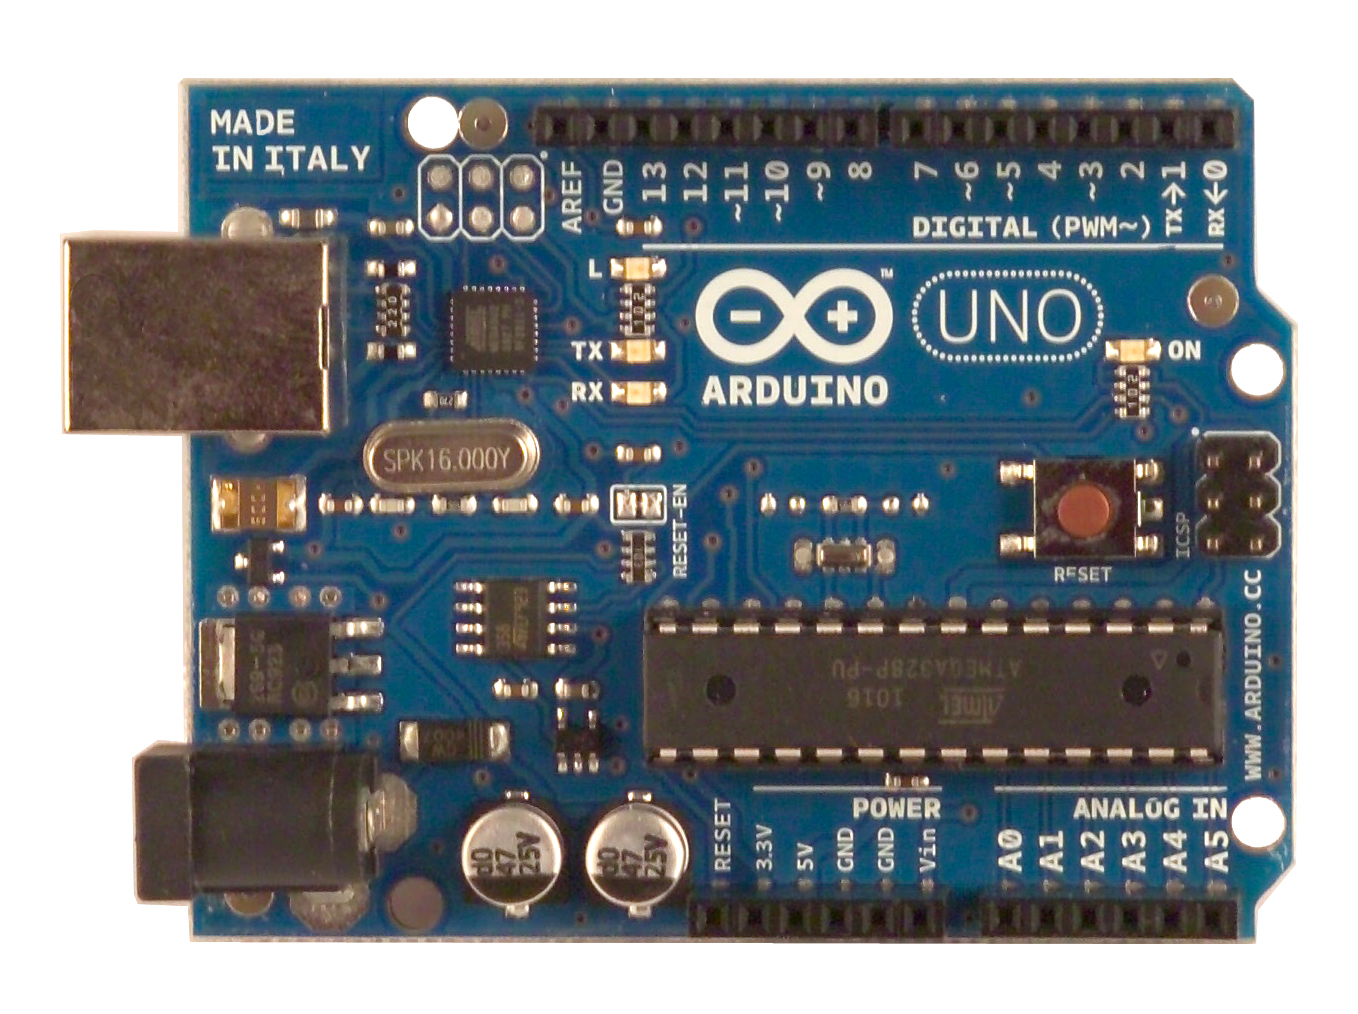
Fig 1: Credit Card Fig 2: Arduino Board Schematic
Syntax/Instructions Used
digitalWrite(PIN, ); - sends digital value to PIN
pinMode(PIN, MODE); - assigns I/O operation/MODE to PIN
delay(time); - delays by time in milliseconds
void setup(){} - operation to be executed only once
void loop(){} - operation to be executed repeatedly

void setup()
{
pinMode(2, OUTPUT);
pinMode(3, OUTPUT);
pinMode(4, OUTPUT);
pinMode(13, OUTPUT);
}
void loop()
{
digitalWrite(13, HIGH);
delay(3000);
digitalWrite(13, LOW);
digitalWrite(2, HIGH);
digitalWrite(3, HIGH);
digitalWrite(4, HIGH);
delay(1000);
digitalWrite(2, LOW);
digitalWrite(3, LOW);
digitalWrite(4, LOW);
}
Demos/Results
I demonstrated my knowledge and approach during the demo of the lab. I showed how to first verify the code, and then upload on to the arduino board. I was instructed to alter the function of my program by making the LED flash one after the other which I did by making each pin HIGH, applied a delay and then LOW sequentially.

FIG 4: 1 LED FLASHING (FOR 3 SECONDS)

Fig 3: 3 LED FLASHING (FOR 1 SECOND)
My video of code modification to make LEDs flash sequentially
Conclusion
The first thing I did was to develop a design solution and then a pseudocode which I later converted to a flowchart and then finally to an actual Arduino code. I immediately identified the pins to be used on the arduino board and assigned them to Output digital in the setup section of my arduino code. The first problem I encountered was when I tried making the 2 operations (1 Flashing LED and 3 Flashing LED) execute simultaneously. I initially created two loop functions for each and then called them in the main loop function but I realized that for simplicity, it would be more appropriate to have both operations written and executed within the main loop. So I made all 4 LED flashing in the main loop section. I connected a resistor in series to all the LEDs to prevent excess current from flowing through and as a result burn the LEDs.
No comments:
Post a Comment